Top 10 Tips to Design Solar Lighting for Large Areas

Time:2026-10-27 Author:Sophia
0%

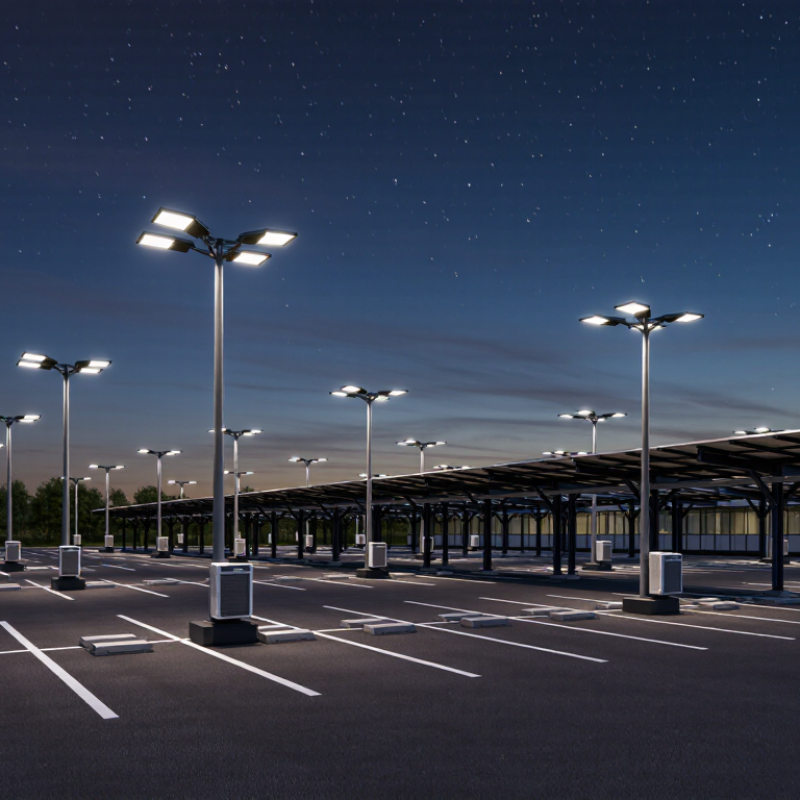
Designing solar lighting for a large area requires more than placing panels above lamps. It demands careful observation, practical testing, and reliable engineering decisions. This guide explains how to design a solar lighting system for large areas, including site surveys, lighting levels, battery capacity, panel angles, pole spacing, and maintenance access.

Energy strategist Amory Lovins once said, “The best way to save energy is not to use it.” That principle matters in solar lighting. Efficient LED fixtures, smart dimming, and motion sensors can reduce unnecessary nighttime consumption. A poorly sized system may leave pathways dark after cloudy days. That failure is avoidable.

Start with the site.

Measure the area at night. Note trees, buildings, slopes, vehicle routes, and pedestrian movement. A parking lot needs different lighting from a public walkway or remote industrial yard. Photometric software can estimate coverage, but field checks remain valuable. Real surfaces reflect light differently than digital models suggest.

These ten design tips focus on decisions that affect safety, performance, and long-term cost. They consider local sunlight, seasonal weather, temperature, battery aging, and vandal-resistant construction. However, no standard design works everywhere. A coastal site may face corrosion, while a dusty location may reduce panel output. I have seen projects overestimate sunlight and underestimate cleaning requirements. That lesson deserves attention.

A credible design also follows applicable electrical, structural, accessibility, and lighting regulations. Qualified professionals should verify the final plan before installation. Good solar lighting is not simply bright. It is dependable, measured, and suited to real human movement.
Top 10 Tips to Design Solar Lighting for Large Areas

Define Illuminance Targets Using IES RP-8 Levels of 5–20 lux

For large-area solar lighting, define the illuminance target before selecting poles, optics, or batteries. IES RP-8-18 provides roadway lighting guidance, but it does not assign one universal value for every site. A practical planning range is 5–20 lux, adjusted for traffic, pedestrian activity, surface reflectance, and security needs. Low-use paths may need about 5 lux. Busy access roads can require 10–20 lux.

Measure the actual ground plane. Not the fixture output. A calibrated lux meter should record average and minimum readings after installation. The U.S. Department of Energy reports that modern LED systems commonly exceed 100 lumens per watt, but higher efficacy does not guarantee uniform lighting. Spacing, mounting height, beam distribution, and battery dimming still control site performance. Keep these variables visible in the design file.

Uniformity deserves equal attention. A bright center with dark edges can feel unsafe, even when average illuminance meets the target. IES guidance commonly evaluates minimum-to-average relationships, so a 10-lux average may still fail if the minimum is too low. CIE 150:2017 also recommends controlling spill light and glare near homes and roads. Measure twice. We often overestimate field brightness. Seasonal battery limits, dust, aging modules, and cloudy weeks can reduce output, so a maintained target should include realistic losses rather than ideal laboratory values.

Calculate LED Output at 100–200 lm/W for Area Coverage

Designing solar lighting for a large area starts with a reliable lumen calculation. The U.S. Department of Energy’s solid-state lighting reports place modern LED efficacy around 100–200 lumens per watt, depending on temperature, optics, and driver performance. Do not treat 200 lm/W as guaranteed.

Use this practical formula: required lumens = area × target lux ÷ utilization factor ÷ maintenance factor. For a 2,000-square-meter yard needing 20 lux, with 0.60 utilization and 0.80 maintenance factors, the result is about 83,333 lumens. At 150 lm/W, the LED load becomes approximately 556 watts. At 100 lm/W, it rises to 833 watts. Small efficiency changes matter.

IES lighting recommendations can help define target illuminance, but local tasks still control the design. A pedestrian path, loading zone, and storage yard need different light levels. Photometric software should check spacing, uniformity, glare, and shadows. CIE guidance also supports evaluating maintained illuminance, not only initial output. Real projects often lose output through dirt, heat, battery limits, and cloudy weather.

Measure the site.

A common mistake is sizing panels from LED wattage alone. Calculate nightly energy, autonomy days, seasonal solar availability, and battery losses. My field experience suggests adding a modest design margin, then reviewing it against cost and visual comfort. More light is not always better. Overlighting wastes stored energy and may create harsh contrast.

Size Solar Panels for 3–5 Peak-Sun-Hours per Day

Designing solar lighting for a large area begins with realistic panel sizing. Use 3–5 peak-sun-hours per day, not the longest summer daylight period. A site receiving four peak-sun-hours can produce about 400 watt-hours from a 100-watt panel before system losses. Charge controllers, wiring, dust, heat, and battery charging may reduce usable energy by 20–30 percent.

Measure the lighting load carefully. A 40-watt fixture running for ten hours needs 400 watt-hours nightly. With four peak-sun-hours and an estimated 75 percent system efficiency, the panel should provide around 133 watts. Choosing a 150-watt panel adds useful margin. Leave room for cloudy days. Large open sites often have unexpected shadows from poles, trees, or nearby structures.

Panel angle matters.

A practical installation should also match the battery and operating schedule. If the lights must work through two low-sun days, increase storage rather than relying only on a larger panel. In my field planning experience, designers often trust average solar data too much. That can create dim lighting during wet weeks. Recheck local sunlight records, seasonal temperatures, and the actual nighttime lighting requirement. A simple test with a temporary meter can reveal errors before permanent installation. Oversizing is not always efficient, but undersizing creates service problems quickly. Panels should remain accessible for cleaning and inspection, especially near dusty roads or agricultural areas.

Specify Batteries for 3–5 Nights of Autonomy at 80% DoD

For large-area solar lighting, battery autonomy deserves more attention than panel size. A dark, rainy stretch can expose weak assumptions quickly. Specify three to five nights of operation without useful solar charging. Set the design limit at 80% depth of discharge (DoD). This leaves a 20% reserve, reducing stress on the cells. It also gives maintenance teams a clearer failure margin. Keep the requirement measurable.

Start with nightly energy demand. Multiply lamp wattage by operating hours, then include controller, cable, and conversion losses. For example, a 40-watt fixture running 12 hours uses 480 watt-hours before system losses. Five nights require 2,400 watt-hours of delivered energy. If the battery is limited to 80% DoD, divide that figure by 0.8. Add cold-weather derating and capacity loss from aging. A practical specification may therefore exceed 3,000 watt-hours. Exact values depend on temperature and charging conditions.

Do not size from average weather alone. Review local irradiance records, storm patterns, and required lighting levels. During commissioning, log battery voltage, charging current, and overnight runtime. This evidence can challenge the original model. Field teams often find designs that pass calculations but dim before dawn after several cloudy days. That is not always a battery fault. Dirty panels, shading, or incorrect load schedules may be responsible. Leave access for inspection and replacement. Oversizing can waste money and reduce charging efficiency, so check every assumption again.

Top 10 Tips to Design Solar Lighting for Large Areas - Specify Batteries for 3–5 Nights of Autonomy at 80% DoD

No. Design Tip Key Design Dimension Recommended Specification Engineering Basis
1 Define the lighting objective Required illuminance and uniformity Set the target by application: approximately 5–10 lux for paths, 10–20 lux for general outdoor areas, and higher levels for vehicle or task areas. Lighting requirements vary significantly by pedestrian activity, vehicle movement, security needs, and applicable local standards.
2 Divide the site into lighting zones Pole spacing and coverage Use photometric modeling to position poles typically 20–35 m apart, then adjust for mounting height, beam angle, terrain, and required uniformity. Uniform pole spacing alone does not guarantee uniform illumination; optical distribution and site geometry must be evaluated together.
3 Select an efficient LED luminaire Optical efficiency and light output Specify outdoor LED luminaires with system efficacy of about 120–180 lm/W, suitable glare control, and a minimum IP65 enclosure rating. Higher efficacy reduces daily energy demand, which directly decreases the required battery and photovoltaic array size.
4 Calculate the actual daily load Energy consumption per night Calculate: Daily load (Wh) = luminaire power (W) × operating hours + controller and auxiliary losses. For example, 60 W × 5 h plus losses is approximately 300–330 Wh/night. Sizing from lamp wattage alone can underestimate demand because dimming schedules, standby consumption, wiring loss, and conversion efficiency also matter.
5 Specify 3–5 nights of autonomy Battery usable energy Provide enough nominal battery energy for 3–5 consecutive nights without useful solar charging, using an 80% maximum depth of discharge. Required nominal battery energy = daily load × autonomy nights ÷ 0.80. Five nights provides greater resilience in cloudy or rainy periods.
6 Convert battery energy into amp-hours System voltage and capacity Use: Battery capacity (Ah) = daily load × nights ÷ (system voltage × 0.80). For 300 Wh/night, 5 nights, and 24 V: 300 × 5 ÷ (24 × 0.80) = 78.1 Ah; select at least 24 V, 100 Ah after standard size and temperature allowances. The selected battery should exceed the calculated minimum and be checked against manufacturer limits, low-temperature charging restrictions, and end-of-life capacity.
7 Size the photovoltaic array for the worst month Solar resource and recharge energy Use the site’s lowest monthly peak sun hours. Example: for 330 Wh/day, 4.5 peak sun hours, and 75% total charging efficiency, the minimum array is about 98 W; specify approximately 120 W or more after design margin. Worst-month solar radiation, temperature, dust, shading, module tolerance, and charge-controller losses affect real charging performance.
8 Control light output intelligently Dimming and operating schedule Use astronomical timing, motion detection, or scheduled dimming; a practical profile is 100% output during peak activity and 30–50% output during low-traffic hours. Reducing overnight power demand can extend autonomy and improve performance during consecutive low-sun days, provided safety requirements remain satisfied.
9 Manage shading, orientation, and drainage PV exposure and environmental protection Keep the photovoltaic module free from significant shade during the main solar window, orient it toward the equator, and provide a tilt suitable for the local latitude and seasonal demand. Even partial shading can reduce array output disproportionately. Drainage, corrosion resistance, and wind loading are also essential for large-area installations.
10 Plan for safety and maintenance Protection, access, and service life Include overcurrent protection, battery management, grounding where required, surge protection, secure battery housing, inspection access, and a cleaning or inspection schedule at least twice per year. Reliable operation depends on thermal management, correct cable sizing, safe isolation, corrosion control, battery monitoring, and timely replacement of degraded components.
Battery sizing reference: For a 300 Wh nightly load, a 3-night system requires at least 1,125 Wh nominal battery energy at 80% DoD; a 5-night system requires at least 1,875 Wh. At 24 V, these values equal approximately 46.9 Ah and 78.1 Ah respectively before additional temperature, aging, and design-margin allowances.

Verify IP65 Protection and IEC 60598 Compliance Before Deployment

Large-area solar lighting often fails at the enclosure, not the panel. Before deployment, verify IP65 protection for the complete luminaire. IP65 means dust-tight protection and resistance to water jets. It does not permit immersion. This distinction matters near irrigation lines, coastal spray, and washdown zones. The IEA’s Energy Efficiency 2023 analysis places lighting at roughly 15% of global electricity use. Reliable outdoor design protects both energy savings and public safety.

IEC 60598 compliance should be supported by test documentation, not a printed mark. Ask for applicable IEC 60598-1 safety evidence and relevant outdoor-luminaire requirements. Check insulation, earthing, creepage distances, thermal behavior, and mechanical strength. Inspect cable glands and seals after installation. Small gaps become large failures. In field projects, photograph every connector before burial and record tightening torque. That record makes later maintenance more credible.

IRENA’s Renewable Capacity Statistics 2024 reports global solar PV capacity above 1.4 terawatts in 2023. Scale is growing. Yet certification cannot correct poor site design. Specify drainage, corrosion resistance, battery ventilation, and accessible inspection points. Measure ground-level illuminance after rainy nights and partial shading. One uncomfortable lesson remains: IP65 and IEC 60598 evidence do not guarantee useful lighting. Uniformity, glare, autonomy, and emergency access still require on-site validation.

FAQS

What illuminance level is suitable for a large solar-lit area?

Low-use paths may need about 5 lux. Busy access roads may need 10–20 lux. Match the target to activity, traffic, and surface reflectance.

Should illuminance be measured at the fixture or on the ground?

Measure the actual ground plane. Use a calibrated lux meter after installation. Check both average and minimum readings.

Why is uniformity important in large-area lighting?

A bright center and dark edges can feel unsafe. A 10-lux average may still fail when the minimum level is too low. Measure twice.

How many lumens might a 2,000-square-meter yard require?

At 20 lux, 0.60 utilization, and 0.80 maintenance factors, it needs about 83,333 lumens. This is only a planning estimate.

What LED efficacy should be used for preliminary calculations?

Use roughly 100–200 lumens per watt. Do not assume 200 lumens per watt is guaranteed. Heat, optics, and drivers reduce performance.

How can the required LED power be estimated?

Divide required lumens by LED efficacy. At 150 lumens per watt, 83,333 lumens require about 556 watts. At 100,000? No—about 833 watts.

How should solar panels be sized for nightly lighting?

Plan around 3–5 peak-sun-hours daily. A 40-watt light running ten hours uses 400 watt-hours. With 75% efficiency, a 150-watt panel provides useful margin.

What factors can reduce solar lighting performance?

Dust, heat, cloudy weather, wiring losses, battery charging, and shadows can reduce output. Seasonal limits matter. We often trust average sunlight too much.

How many battery autonomy days should a system provide?

Size storage for the required cloudy period, such as two low-sun days. Increasing the panel alone may not solve storage shortages. Check real weather records.

What should be reviewed before permanent installation?

Check pole spacing, beam distribution, glare, shadows, panel angle, and maintenance access. A temporary meter test can expose design errors early.

Conclusion

Designing reliable solar lighting for large areas begins with clear performance targets. Use IES RP-8 guidance to establish illuminance levels, typically between 5 and 20 lux, according to the site’s safety and visibility requirements. Then calculate the required LED output for the total coverage area, using an efficiency range of approximately 100–200 lumens per watt to balance brightness and energy consumption. Proper spacing, mounting height, beam distribution, and lighting uniformity should also be considered.

When planning how to design a solar lighting system for large areas, match the solar array to the local energy demand and expect about 3–5 peak-sun-hours per day. Select battery capacity for 3–5 nights of autonomy while limiting discharge to 80% depth of discharge to extend service life. Before deployment, verify that every outdoor component provides at least IP65 protection and complies with IEC 60598 requirements. Field testing should confirm illumination, charging performance, weather resistance, and dependable operation throughout the intended service period.

Sophia

Sophia

Sophia is a dedicated marketing professional with an exceptional depth of knowledge about her company's products and services. With a keen understanding of market trends and customer needs, she crafts insightful blog posts that not only inform but also engage readers, enriching the company’s online......