Solar lighting promises a simple result: charge by day, illuminate at night. Yet a lamp that flickers after sunset, stays dim, or fails after rain can quickly undermine that promise. These symptoms often point to practical issues, such as a shaded panel, a depleted battery, dirty contacts, or an incorrect operating mode. Small details matter. A few hours of afternoon shade can change how long a light runs overnight.
The market is expanding rapidly. IEA PVPS reported that global photovoltaic capacity grew by about 447 GW in 2023, bringing cumulative capacity above 1.6 TW. That figure covers solar power broadly, not solar lighting alone, but it reflects the technology’s growing reach. For component context, the U.S. Department of Energy notes that LED bulbs use at least 75% less energy than incandescent lighting. Efficiency helps, but it cannot compensate for a battery that no longer holds charge or a panel covered in dust.
Knowing how to troubleshoot common solar lighting problems starts with observing when the failure occurs. Does the light work briefly, then fade? Does it fail only after cloudy days? These clues help distinguish charging problems from battery wear, sensor interference, or wiring faults. There is no universal fix. Product designs vary, and replacing a part before checking the panel or settings can waste time. The guidance ahead focuses on safe, practical checks and explains when a component may need professional attention. Even careful troubleshooting has limits. A useful first step is often simply cleaning the panel and watching the next night’s performance.
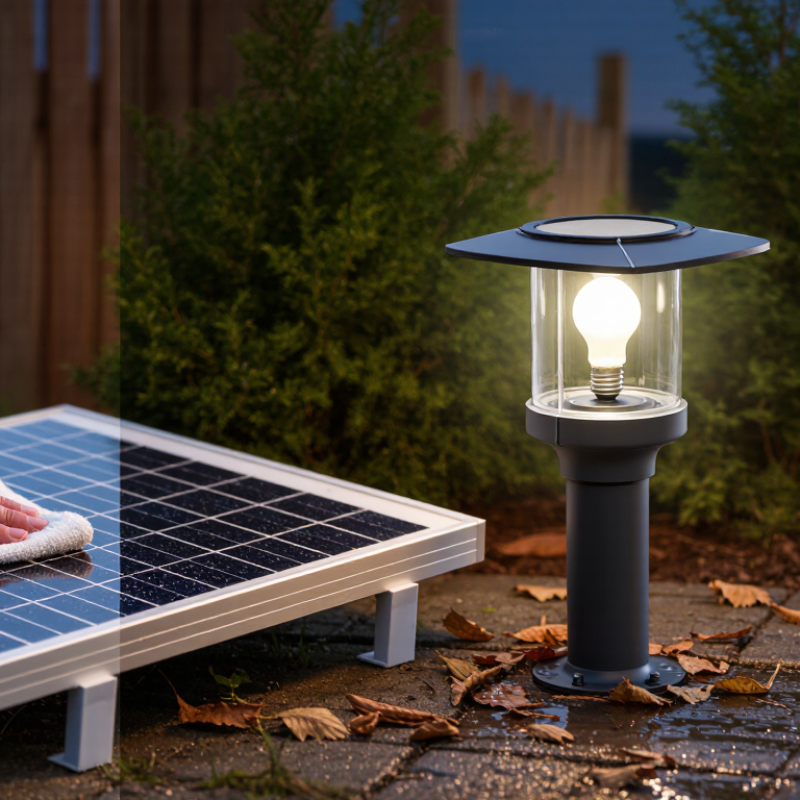
A solar light is a small energy system, not just an LED with a panel. During daylight, photovoltaic cells convert sunlight into electricity, and a charge controller directs that energy into a rechargeable battery. At dusk, a light sensor signals the controller to power the LED. Simple in theory. Each part still affects runtime.
Panel exposure is often the first thing to check. A panel shaded by a roof edge, branch, or even a nearby wall may collect less energy than expected. Dust and pollen can also reduce sunlight reaching its surface. Clean the panel gently and check its angle at different times of day. A bright afternoon alone does not prove it receives enough direct sun.
Battery condition, temperature, and light settings matter too. Cold weather can reduce battery output, while a worn battery may hold less charge than it once did. A brighter setting usually uses energy faster. If the light fades early, compare its runtime after a clear day with its runtime after cloudy weather. That comparison is useful, though not perfect. Check connections and the product’s instructions before testing or replacing components; voltage readings need to be judged against that system’s specifications.
Inspect the panel in daylight, not under a streetlamp. Look for dust, bird residue, cracks, loose wiring, or shade from new branches. IEA PVPS Task 13’s 2022 review estimates global PV soiling losses at roughly 3–5%, though local conditions differ widely. Clean the surface gently with a damp, soft cloth; abrasive scrubbing can cause damage. Jordan and Kurtz’s 2016 Compendium of Photovoltaic Degradation Rates reports a median module decline near 0.5% annually across studies. That long-term figure is not a diagnosis: sudden dimming usually deserves a closer check.
Check the battery after the panel. Inspect for corrosion, swollen casing, wetness, or a loose connector; stop using a visibly damaged battery. If it looks sound, note whether the light runs shorter after a full sunny day. Battery age, cold weather, and repeated cloudy days can all reduce runtime. A clean panel is not proof of a healthy system. Easy to miss.
For sensors, clear cobwebs and leaves, then test motion detection from several angles and distances. Adjust the sensor away from moving branches or warm vents. Check the fixture for condensation, cracked covers, and loose connections; water inside can interrupt operation. Compare brightness and runtime over two or three nights, recording weather and settings. One test can mislead. If wiring is exposed or damage persists, have a qualified technician inspect it rather than guessing.
Solar lights that grow dim often have a simple cause: too little sunlight reaches the panel. Shade from a new branch, dust, or a panel tilted away from the sun can reduce daytime charging. Short winter days may also leave the battery with less stored energy. If a light works briefly, then fades, its rechargeable battery may be worn or unable to hold a full charge. Battery failure is common, but not always the answer.
Lights that do not turn on may be switched off, set to a low-output mode, or triggered only by darkness. A nearby porch light can confuse the light sensor. Motion-sensing models may miss movement when their sensors point too high or are blocked. Loose connections, corroded contacts, or moisture inside the housing can also interrupt power. The clues can overlap. A dim light is frustrating, and one quick check rarely proves the cause.
Tips: Wipe the panel with a soft, damp cloth and move the light into several hours of direct sun. Check its switch and sensor after dark, away from other lamps. Inspect visible wiring and battery contacts for looseness or corrosion; follow the product instructions before opening the housing. If performance stays poor after these checks, compare the battery’s age and condition with the manufacturer’s guidance. Don’t replace parts by guesswork.
This chart counts common cause categories to check for each problem. The counts are troubleshooting lists, not measured failure rates.
How to use it: Start with the likely causes listed for the symptom. Check sunlight exposure and panel cleanliness, then inspect the battery, connections, controller, and LED unit as appropriate.
Top Solar Lighting Problems and How to Troubleshoot Them
Step-by-Step Troubleshooting for Dim, Flickering, or Nonworking Lights
When a solar light looks dim, check the panel before replacing parts. Wipe away dust, leaves, or bird droppings with a damp cloth. Make sure nearby branches do not cast shade across it. Then switch the light off, leave it in direct sun for a full day, and test it after dark. If it flickers, inspect the battery compartment for a loose connection or corrosion. Reseat the battery only if the unit’s instructions allow it. No change? The battery may no longer hold enough charge.
For a light that stays off, check its switch and motion sensor, if fitted. Cover the panel briefly after sunset to see whether darkness triggers the light. This simple test is not conclusive, but it can reveal a sensor or placement issue. A 2013 review by Jordan and Kurtz found median photovoltaic-module degradation near 0.5% yearly. The study appeared in Progress in Photovoltaics; it covers PV modules, not every small garden light. So, gradual panel aging is possible, but sudden failure points elsewhere.
Tips: Test one light at a time. Compare its panel exposure with a working light nearby. Check after a sunny day, not a cloudy afternoon. Keep a note of the symptom and test result; it is easy to forget what changed. If wiring looks damaged, stop and consult a qualified repair professional.
Solar lights often fail gradually: shorter evening run times, dim output, or inconsistent charging. A simple maintenance routine can prevent many recurring problems. Wipe the panel with a soft, damp cloth every few weeks, especially after dust or pollen leaves a film. Keep nearby plants trimmed so direct sunlight reaches the panel for several hours daily. Shade can shift as branches grow.
Inspect each fixture monthly. Check that the switch is on, the panel has a clear view of the sky, and no water has collected inside the housing. Clear leaves from the stake and look for loose connections or cracked seals. After heavy rain, let wet parts dry before testing. Replace rechargeable batteries only with the type and rating specified in the product instructions; mismatched cells can shorten runtime or damage the light. Small habits matter.
If lights dim repeatedly, compare their sun exposure with a nearby working fixture before replacing parts. Winter sunlight, cloudy weeks, and cold temperatures can reduce charging and runtime, even when nothing is broken. Move a shaded light temporarily and observe it over several clear days. Still, maintenance is not a cure-all: a worn battery or damaged panel may need replacement. A brief note of cleaning dates and runtime can reveal patterns, though it is easy to forget to keep one.
| Problem | Likely causes | Troubleshooting steps | Prevention and maintenance |
|---|---|---|---|
| Lights do not turn on at night | The switch is off, the battery is depleted, the panel received too little sunlight, or nearby lighting is confusing the dusk sensor. | Set the light to the correct mode and cover the solar panel briefly to check whether the light responds. Move the fixture away from bright outdoor lamps and allow a full sunny day to recharge. | Check the mode and placement after installation. Keep the panel exposed to daylight and avoid positioning it where night-time lighting shines directly on it. |
| Lights are dim or run for only a short time | Insufficient charging, a dirty or shaded panel, an aging rechargeable battery, or frequent sensor activation. | Clean the panel, remove shading, and check that it receives several hours of direct sunlight when possible. Reduce the brightness or motion-sensor sensitivity if those settings are available. Replace a worn battery with the specified rechargeable type and voltage. | Clean panels periodically and keep them clear of leaves, snow, and other obstructions. Check battery condition at the start of the season and follow the light’s instructions for replacement. |
| Lights do not charge well in winter or cloudy weather | Shorter daylight hours, low sun angle, snow cover, persistent cloud, or cold temperatures can reduce charging and battery output. | Clear snow and debris from the panel and adjust its position toward available sunlight. Allow for shorter run times during extended cloudy periods; check operation again after brighter weather. | Choose a location with the best available year-round sun exposure. In areas with harsh winters, store removable lights as directed by the manufacturer. |
| Lights stay on during the day | The panel is in shade, covered with dirt, or receiving insufficient daylight; the dusk sensor or wiring may also be faulty. | Clean and uncover the panel, then move the light into a brighter location. Turn the light off and back on or reset it according to its instructions. If the problem persists, inspect the connections and sensor for damage. | Keep the panel clear and avoid installing it beneath dense foliage, roof overhangs, or other persistent shade. |
| Light flickers or switches on and off | A loose connection, low battery charge, moisture, a failing battery, or a sensor repeatedly responding to moving shadows or nearby light sources. | Switch the light off before inspection. Check accessible connectors for a secure fit and signs of corrosion, then dry the fixture completely if it is damp. Reposition it away from moving shadows or interfering light. | Inspect seals and connections during routine cleaning. Do not use a fixture with damaged wiring or cracked housing until it has been repaired or replaced. |
| Motion-sensor light triggers too often or not at all | The sensor is aimed poorly, obstructed, set too sensitively, or affected by nearby movement, heat sources, or low battery charge. | Clear the sensor’s field of view and adjust its direction and sensitivity. Test it from the expected approach path and confirm the battery is adequately charged. | Keep plants and objects from blocking the sensor. Recheck the aim after landscaping changes or when seasonal growth alters the surrounding area. |
| Water or condensation appears inside the fixture | A damaged seal, cracked housing, loose cover, or installation outside the fixture’s weather-resistance rating. | Switch off the light and allow it to dry fully. Check for visible cracks or displaced seals; replace damaged parts or the fixture rather than relying on a temporary seal that may trap moisture. | Use fixtures rated for their location and install covers and seals as instructed. Inspect the housing after storms and avoid submerging fixtures that are not designed for it. |
| Battery does not hold a charge | The rechargeable battery has reached the end of its service life, has been stored discharged for a long period, or is the wrong type for the fixture. | Check the product instructions for the required battery chemistry, size, and voltage. Replace it only with a compatible rechargeable battery; do not substitute a non-rechargeable battery unless the fixture specifically permits it. | Follow the recommended seasonal storage and battery-care instructions. Dispose of used batteries through an appropriate local collection or recycling program. |
Its panel converts daylight into electricity. A controller charges the battery, then powers the LED after dusk. Small system, many dependencies.
Shade, dust, or a poor panel angle can limit charging. A worn battery or cold weather may also reduce brightness. Not always the battery.
Wipe it gently with a damp, soft cloth. Check for pollen, bird residue, and nearby branches. Avoid abrasive scrubbing.
Check it at different times of day, not just during a bright afternoon. Roof edges and walls can cast moving shade. One sunny day proves little.
Look for corrosion, a swollen case, wetness, or loose connectors. Stop using a visibly damaged battery. Follow the product instructions before opening the housing.
Cloudy days, short winter daylight, and battery age can shorten runtime. Compare two or three nights, noting weather and brightness settings. Tests can mislead.
Leaves or cobwebs may block its sensor. Test from different angles and distances, then point it away from branches or warm vents. Try after dark.
Check the switch, visible wiring, contacts, and fixture cover for moisture or cracks. Compare battery age with the instructions. Don’t guess at replacement parts. A technician may help.
Solar lighting systems rely on panels to collect sunlight, batteries to store energy, sensors to control operation, and fixtures to produce light. Their performance can be affected by limited sun exposure, dirt or shade on the panels, aging batteries, incorrect settings, loose connections, or damaged components. A careful inspection of each part can help narrow down the cause before any repairs are attempted.
This guide explains how to troubleshoot common solar lighting problems, including dim, flickering, and nonworking lights. It offers a step-by-step approach: check panel cleanliness and placement, confirm that the battery is charging and connected properly, test sensor settings, and examine the fixture and wiring for visible issues. Regular cleaning, sensible positioning, and timely battery replacement can help maintain dependable lighting and reduce recurring problems.

GKE Power