Outdoor solar lights face rain, condensation, dust, salt spray, and repeated temperature changes. A small seal failure can darken an entire pathway. Learning how to waterproof outdoor solar lighting systems therefore requires more than choosing a large battery or applying exterior tape.
The International Electrotechnical Commission’s IEC 60529 standard defines protection levels through IP ratings. IPX4 resists splashing water, while IPX7 addresses temporary immersion under controlled test conditions. These ratings do not guarantee performance after years of sunlight, freezing, or poor installation. Details matter. A cracked gasket matters. So does trapped moisture beneath a lens.
NREL’s photovoltaic degradation review reports a median annual module degradation rate near 0.5%. That figure concerns energy output, not enclosure waterproofing, but it highlights a practical truth: outdoor systems slowly lose resilience. The U.S. Department of Energy also emphasizes durability, thermal management, and reliable encapsulation in solid-state lighting programs. This guide presents seven practical waterproofing tips, including enclosure selection, cable entry protection, gasket inspection, drainage, sealant choice, and seasonal testing. Each recommendation connects field experience with recognized testing principles. However, no method is permanent. Even a well-rated fixture may fail when water pools around an unsealed connector or when silicone is applied to a dirty surface. Small mistakes are common. Regular inspection remains essential.
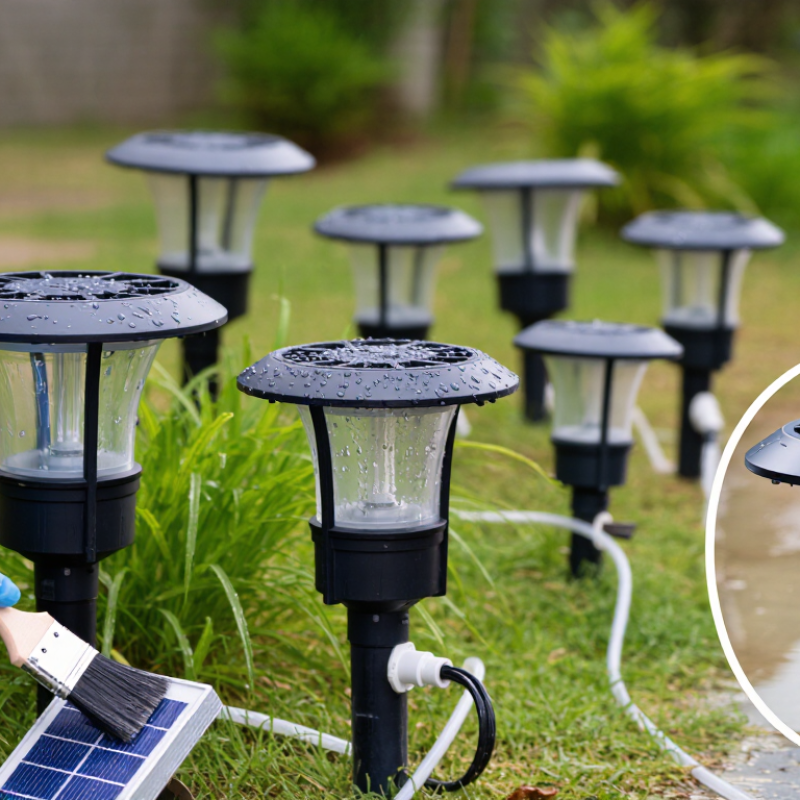
7 Tips to Waterproof Outdoor Solar Lighting Systems
Outdoor solar lights face rain, dust, condensation, and sharp temperature changes. Waterproofing begins with the right protection rating. IEC 60529 classifies IPX4 as splash resistance, IPX7 as temporary immersion, and IPX8 as continuous immersion under stated conditions. Choose IP65 or higher for exposed garden fixtures, but inspect the complete assembly, not only the lamp housing. Water often enters through cable joints.
Seal the battery compartment carefully. Keep its gasket clean and evenly seated. Tighten screws without crushing the seal. Use weatherproof cable glands at ground-level connections. Position the solar panel with a slight slope, so water cannot pool around its frame. Mount lights above muddy splash zones. Remove leaves from drainage channels. Small details matter. The U.S. Department of Energy reports that LED lighting uses at least 75% less energy than incandescent lighting and can last up to 25 times longer, but moisture can still shorten electronic component life.
Check fixtures after heavy rain, then again before winter. Look for fogged lenses, green corrosion, loose screws, or a dimming battery. Replace cracked seals early. Do not assume a high IP rating guarantees permanent protection; installation errors can defeat it. I have seen otherwise sound lights fail because a connector faced upward. That mistake is easy to repeat. The International Energy Agency also identifies efficient lighting as a major electricity-saving opportunity, making maintenance worthwhile. Yet ratings are not magic. Test the actual site conditions, record failures, and improve the installation.
Waterproof outdoor solar lighting begins with material choice. Select UV-stable polycarbonate, tempered glass, and corrosion-resistant stainless steel. These materials handle sunlight, rain, and temperature changes better than ordinary plastic or untreated metal. Check the fixture’s published outdoor ingress rating before installation. An IP rating helps, but sealing quality matters just as much. Silicone gaskets should sit flat, without twists or gaps.
Fixture design also controls water exposure. Choose downward-facing lights that shed rain instead of collecting it. Keep cable entries above the lowest point, and create a small drip loop below each connection. Sealed cable glands protect joints from splash water. Avoid exposed switches and open battery compartments. Place the solar panel where leaves cannot cover it, but do not shelter it under a roof edge. That mistake reduces charging and encourages trapped moisture.
During several outdoor installations, I found that drainage was often overlooked. A tiny opening beneath the housing can prevent condensation from remaining inside. Still, no seal lasts forever. Inspect gaskets, screws, and cable jackets after heavy storms. Replace cracked parts early. Wipe dirt from the panel with a damp cloth, and check the battery compartment every few months. One imperfect detail can defeat an otherwise weather-resistant system.
7 Tips to Waterproof Outdoor Solar Lighting Systems
Seal Cables, Connections, and Openings Against Moisture
Waterproofing starts at every entry point, not the lamp housing. Choose equipment with a suitable IP rating for its location. IEC 60529:2013 classifies IPX4 for water splashes and IPX7 for temporary immersion up to one metre for 30 minutes. Do not guess. Seal cable openings with outdoor-rated glands, then tighten them around the cable jacket. Leave no loose threads, cracked seals, or exposed copper.
Use gel-filled connectors or heat-shrink sleeves on every cable joint. Keep connections above soil, mulch, and standing water. Create a small downward drip loop before the cable enters the housing. Water finds gaps. Close unused openings with compatible plugs, rather than tape alone. NEMA 250 identifies Type 4 enclosures for hose-directed water, while immersion requires a different enclosure classification. Ratings matter, but installation still decides the outcome.
Mount the fixture on a stable surface, slightly above nearby puddles. Inspect seals after heavy rain, freezing weather, and landscaping work. Look for cloudy lenses, green corrosion, brittle cables, or a flickering light. Replace damaged gaskets early. I once trusted a tight-looking cap; moisture had already entered through a tiny split. That mistake was preventable. Avoid drilling new holes unless the enclosure manufacturer permits it. Test the system after sealing, then recheck it during the next wet season.
Outdoor solar lights usually fail where water collects, not where rain falls. I inspect every installation after a heavy shower. Low soil, compacted mulch, and blocked paths often leave puddles around the base. Choose a slightly raised location, then tilt the ground away from the fixture. Keep the light above splashback from roofs, sprinklers, and paving. A two-inch gravel bed can improve drainage, but it should not hide the drainage outlet.
Use a fixture with a weather-resistance rating suited to its exposure. Inspect the gasket and housing seam before installation. Keep the panel clear, and angle it so rain cannot drain toward the housing. Route cables with a downward loop, preventing water from running into connectors. Never drill extra holes in a sealed housing. Place stakes firmly, but avoid crushing the drainage channel. Leave space between the light and dense plants. I once trusted a “waterproof” label and skipped the slope. That mistake caused corrosion within one season.
After storms, remove leaves and check for standing water. Press the soil around the stake gently, because loose ground can redirect runoff. Watch for cracked seals, cloudy lenses, or green corrosion near contacts. If water remains for more than a day, improve the surrounding grade. Replace damaged seals before freezing weather arrives. Test the light after cleaning the panel, not before. Record the inspection date beside the installation notes.
Outdoor solar lights face rain, dust, frost, and sudden temperature changes. Waterproof protection needs regular attention, not blind trust. In my maintenance checks, small seal damage often appears before electrical failure.
Tip 1: Inspect the housing after heavy rain. Look for droplets, fogging, or muddy residue inside the lens.
Tip 2: Check rubber gaskets and cable entry points. Replace cracked, flattened, or loose seals promptly.
Tip 3: Clean the panel and light cover with a soft, damp cloth. Avoid spraying water directly into joints.
Tip 4: Test drainage holes beneath the fixture. Blocked openings can trap moisture and cause corrosion.
Tip 5: Examine the installation angle before winter. A tilted fixture should shed water instead of collecting it.
Seasonal changes expose weak protection. In spring, remove leaves and inspect loosened screws. During summer, check hardened seals after prolonged heat. Before freezing weather, wipe away standing water and confirm the enclosure closes firmly.
Tip 6: Watch the wiring near soil, stones, and sharp edges. Protective tubing can reduce abrasion and hidden moisture damage.
Tip 7: Test each light after cleaning and after severe weather. A dim light may indicate water intrusion, not only a weak battery.
I once assumed a sealed cover was still reliable because the light worked. That assumption was wrong. Moisture had already corroded the contacts. Record inspection dates, weather conditions, and repairs. Small notes make recurring problems easier to identify.
| Tip | Season or Timing | Waterproof Component to Inspect | Inspection Method | Recommended Maintenance | Warning Signs |
|---|---|---|---|---|---|
| 1. Check the enclosure rating | Before installation and once each year | Light housing, battery compartment, and control box | Confirm the product documentation lists an outdoor ingress-protection rating suitable for the installation location. IP65 indicates protection against dust and water jets; higher protection may be needed for areas exposed to temporary immersion. | Do not use a fixture outdoors if its enclosure rating is unknown or intended only for dry locations. | Missing rating, cracked housing, loose cover, or exposed electrical parts |
| 2. Inspect gaskets and seals | Spring and autumn; after severe storms | Rubber gasket, O-ring, lens seal, and battery-door seal | Open only the service compartment specified by the manufacturer and look for flattening, brittleness, cuts, dirt, or gaps. | Clean sealing surfaces with a soft, damp cloth. Replace damaged seals with the correct replacement part and close the cover evenly. | Condensation, water droplets, rust, or a cover that no longer closes firmly |
| 3. Protect cable entry points | At installation and every three months | Cable glands, connectors, plugs, and wire insulation | Follow each cable from the fixture to the connection point. Check that connectors are fully seated, pointing downward where practical, and free from damage. | Use outdoor-rated connectors and cable glands. Create a drip loop where appropriate so water does not run directly into a connection. | Frayed insulation, loose plugs, upward-facing connectors, or darkened corrosion marks |
| 4. Keep the solar panel clean | Monthly and after pollen, dust, or snow accumulation | Panel surface, panel frame, and panel-to-cable seal | Look for dirt, bird droppings, standing water, lifted edges, and cracks. Check that the panel is not shaded by new plant growth. | Clean with water and a soft non-abrasive cloth. Avoid harsh chemicals, abrasive pads, and high-pressure spray directed at seals. | Reduced nighttime runtime, cloudy panel surface, cracked glass, or water trapped beneath the panel |
| 5. Control water runoff | Before the rainy season and after landscaping work | Mounting area, drainage path, and ground-level connections | Check whether soil, mulch, leaves, or irrigation spray directs water toward the fixture or leaves it standing in a puddle. | Raise vulnerable connections, improve drainage, clear blocked areas, and redirect sprinklers away from the light. | Persistent puddles, mud around the housing, erosion, or frequent tripping of the fixture |
| 6. Prepare for freezing weather | Before winter and during repeated freeze-thaw cycles | Housing seams, lens, battery compartment, and mounting hardware | Inspect for new cracks, lifted seals, ice expansion, and movement caused by frozen soil or heavy snow. | Remove heavy snow without scraping the panel. Keep vents and drainage openings clear, and follow the specified operating temperature range. | Hairline cracks, cloudy lenses, distorted covers, or water entering after thawing |
| 7. Test after every major weather event | After heavy rain, flooding, hail, strong wind, or extreme heat | Entire fixture, light output, controls, and visible wiring | Inspect during daylight, then verify automatic activation after dark. Disconnect power or remove the battery before opening any service compartment. | Dry the exterior, tighten approved fasteners, replace damaged parts, and stop using the unit if water has reached electrical components. | Flickering, delayed activation, short runtime, tripped protection, or visible internal moisture |
Safety note: Follow the product installation instructions, never modify a sealed enclosure by drilling new holes, and replace any component that compromises the waterproof protection.
Choose IP65 or higher for exposed garden locations. IPX4 resists splashes, while IPX7 handles temporary immersion.
Water often enters through cable joints, loose glands, or cracked gaskets. The housing may look perfectly sealed.
Use weatherproof cable glands, gel-filled connectors, or heat-shrink sleeves. Keep every joint above soil and standing water.
A drip loop bends the cable downward before entry. Water falls away instead of running into the connector.
Place it slightly above puddles, mulch, and muddy splash zones. Keep dense plants away from the fixture.
Install the panel with a slight slope. Water should drain away from the frame and housing.
Look for fogged lenses, green corrosion, loose screws, cracked seals, and dim batteries. Remove leaves from drainage paths.
No. Installation errors can defeat good ratings. I once trusted a sealed cap and missed a tiny split.
Improve the ground slope and consider a two-inch gravel bed. Do not cover the drainage outlet.
Replace them early, especially before freezing weather. Small cracks become expensive problems.
Protecting outdoor solar lights from water starts with understanding where moisture can enter and how each fixture is exposed to rain, humidity, snow, and temperature changes. This guide explains how to waterproof outdoor solar lighting systems by choosing weather-resistant housings, sealed fixtures, durable cables, and suitable connectors. It also highlights the importance of sealing gaps around cable entrances, battery compartments, switches, and mounting openings so moisture cannot reach sensitive electrical parts.
Proper installation is equally important. Lights should be positioned on stable surfaces and angled to prevent water from collecting around panels, joints, or housings, while drainage paths should remain clear. Regular inspections throughout the year can identify cracked seals, loose connections, corrosion, blocked drainage areas, or damaged covers before they cause failures. With careful material selection, thoughtful placement, reliable sealing, and seasonal maintenance, outdoor solar lighting can remain safer, brighter, and more dependable in changing weather conditions.

GKE Power